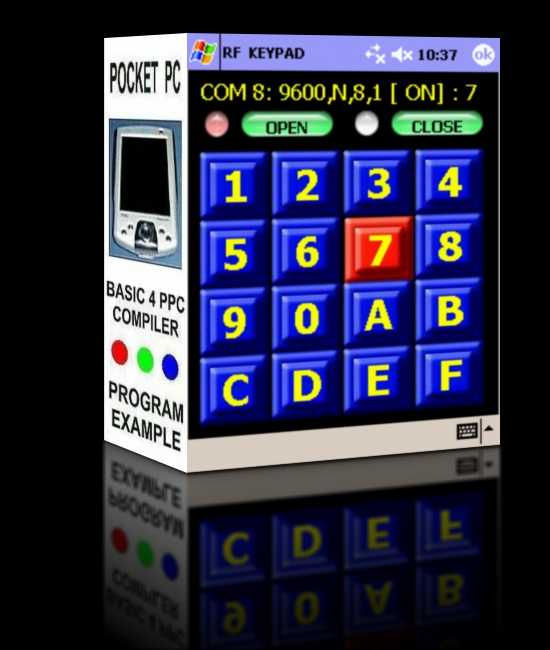
BASIC4PPC COMPILER
PROGRAM EXAMPLE:
RF KEYPAD
This program example will show you how to transmit
keypad characters to a
microcontroller across a
wireless bluetooth serial
port connection.
The Pocket PC used in this example is an HP IPAQ H2200 PDA with:
64 MB of system RAM
32 MB of system flash ROM ( Dated: 5/22/2003 )
OS Version: Windows CE 4.20
Display Resolution: 240 horizontal pixels by 320 vertical pixels
Processor Type: Intel PXA255
Bluetooth
1 SDIO Card Slot
1 Compact Flash Card Slot
Headset / Microphone Jack
This HP H2200 PDA was manufactured in 2003. Any of the newer Pocket PCs with Bluetooth capability running the latest version of the Basic4ppc Compiler should be able to run this simple program example.
The embedded bluetooth hardware module used in this example is a BlueSmiRF module. You can search the Internet and find a variety of embedded bluetooth module boards and fully packaged plug-and-go bluetooth dongles.
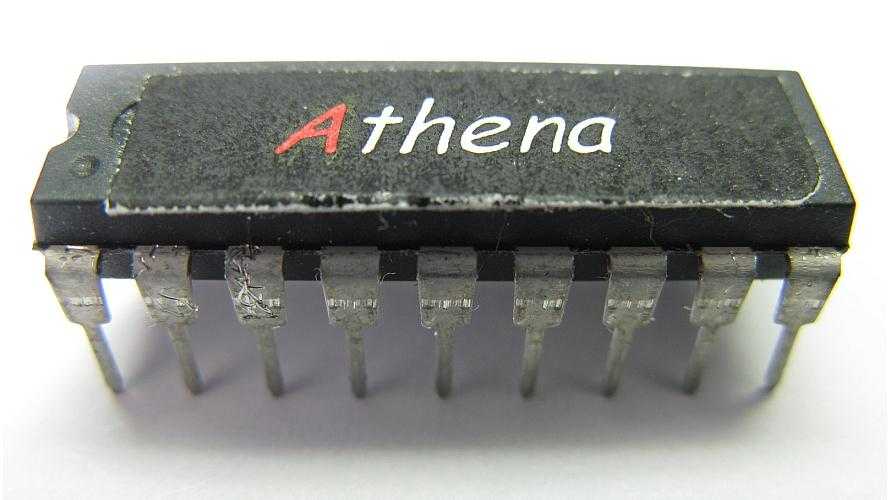
The microcontroller used in this example is the: Athena. The Athena micro is a PIC microcontroller that is pre-programmed with a BASIC Interpreter. The Athena can be programmed easily in BASIC using the IDE software written to run on a Windows compatible desktop PC or laptop.

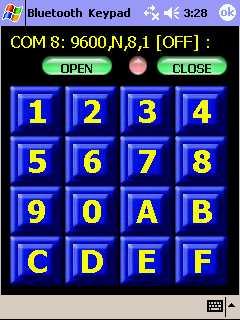
The goal of this program example is to create a Bluetooth Wireless Keypad software
application that runs on a Pocket PC. When a key is pressed, one ASCII character will
be transmitted wirelessly across the Bluetooth Serial Port Connection to the BlueSMiRF
Bluetooth hardware module and passed on to the Athena Microcontroller.
Once the ASCII character has arrived at the Athena Microcontroller, it is processed and
the specific function that we have assigned to the ASCII character can be performed.
You can create all kinds of graphic looks for the keypad buttons. Any graphics image
or "Paint" type of program can be used to create the graphic image for the buttons.
In this example, I have created two graphic images for each of the Keypad Buttons.
One image is for the Key when it is "up" and is not currently being pressed. The
second image is for the Key when it is "down" and is currently being pressed. Using
two graphic images to represent a Key gives you a visual indication when the button
is being pressed.
You can use a Pocket PC to create a Graphical User Interface for a microcontroller.
The Pocket PC software application handles all of the fancy graphics for the user
interface and the microcontroller processes the ASCII character data to perform
a specific function. The Bluetooth Serial Port wirelessly connects the PDA and
microcontroller together. This makes up a simple system that can be plugged into
any type of hardware design. The software development for such a simple system
is fast and easy. It gives new meaning to Rapid Application Development. All of the
software development can be written in various versions of the BASIC language.
There are a variety of "Microcontroller Modules" available today that use some type of
BASIC language for their software development, like the BASIC STAMP, BASIC ATOM,
BASICX, ZBASIC and others. Combine any of these BASIC microcontroller modules
with BASIC4PPC and the Pocket PC and you have a nice little hardware system that
has alot of flexibility, power and is easy to write software for.
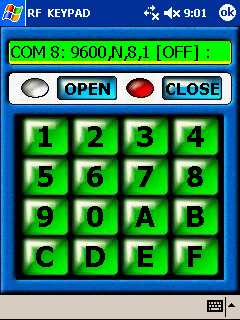
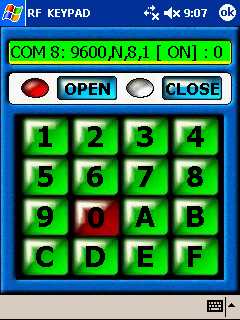
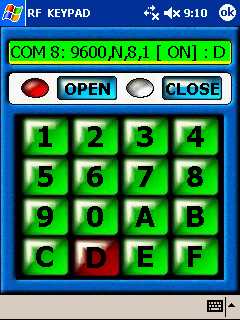
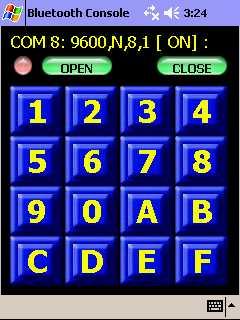
Open the Bluetooth Communications Port between the
Pocket PC and the BlueSMiRF Bluetooth Module.
All keys on the keypad are blue.
No key on the keypad is being pressed.
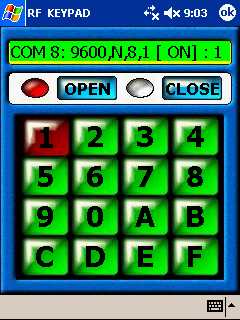
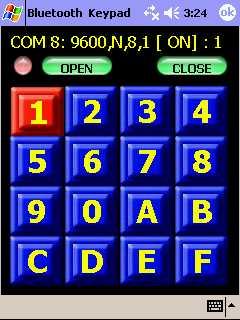
Press key "1"
To transmit the ASCII character that
represents the number 1.
Notice how the "1" key turns from
blue to red to indicate that the "1"
key is being pressed.
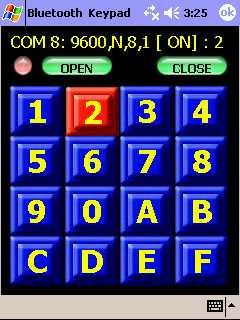
Press key "2"
To transmit the ASCII character that
represents the number 2.
Notice how the "2" key turns from
blue to red to indicate that the "2"
key is being pressed.
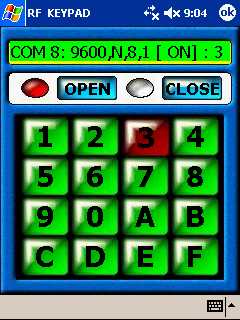
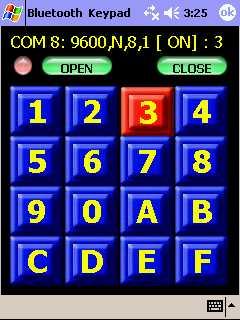
Press key "3"
To transmit the ASCII character that
represents the number 3.
Notice how the "3" key turns from
blue to red to indicate that the "3"
key is being pressed.
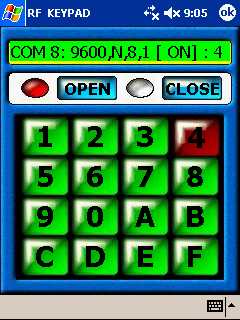
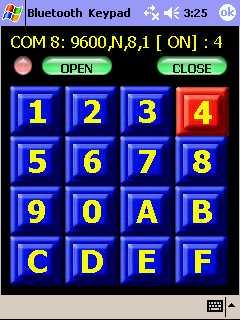
Press key "4"
To transmit the ASCII character that
represents the number 4.
Notice how the "4" key turns from
blue to red to indicate that the "4"
key is being pressed.
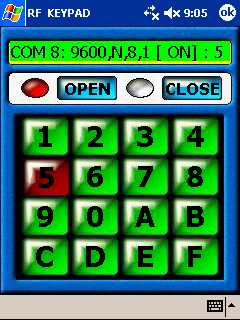
Press key "5"
To transmit the ASCII character that
represents the number 5.
Notice how the "5" key turns from
blue to red to indicate that the "5"
key is being pressed.
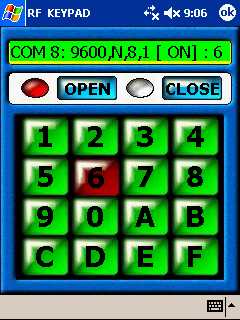
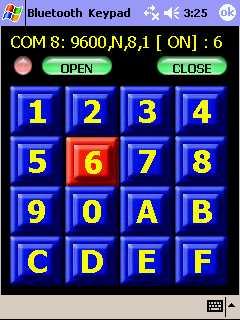
Press key "6"
To transmit the ASCII character that
represents the number 6.
Notice how the "6" key turns from
blue to red to indicate that the "6"
key is being pressed.
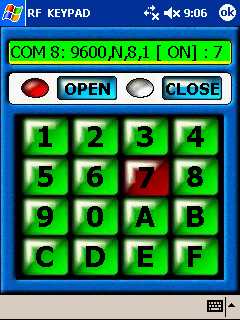
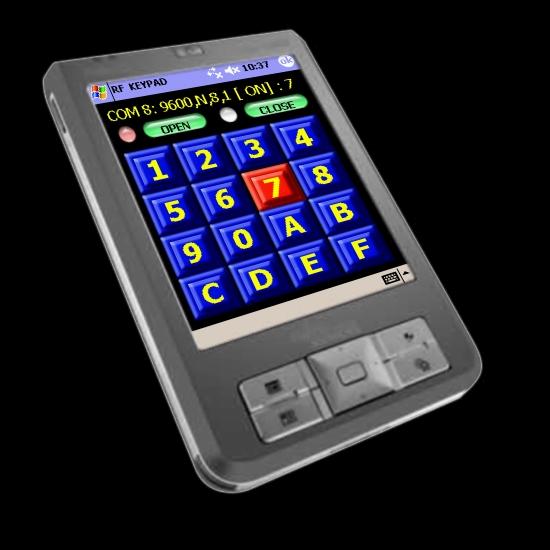
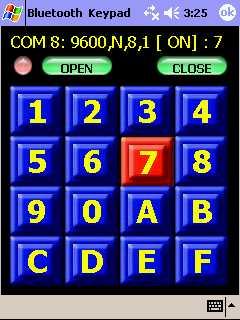
Press key "7"
To transmit the ASCII character that
represents the number 7.
Notice how the "7" key turns from
blue to red to indicate that the "7"
key is being pressed.
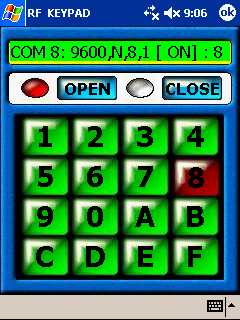
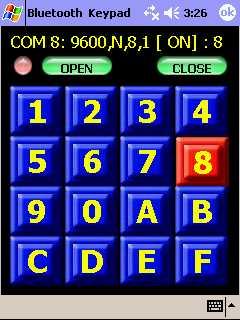
Press key "8"
To transmit the ASCII character that
represents the number 8.
Notice how the "8" key turns from
blue to red to indicate that the "8"
key is being pressed.
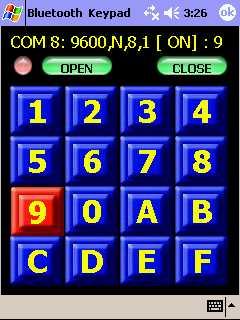
Press key "9"
To transmit the ASCII character that
represents the number 9.
Notice how the "9" key turns from
blue to red to indicate that the "9"
key is being pressed.
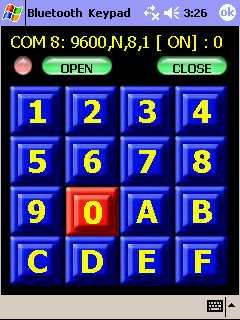
Press key "0"
To transmit the ASCII character that
represents the number 0.
Notice how the "0" key turns from
blue to red to indicate that the "0"
key is being pressed.
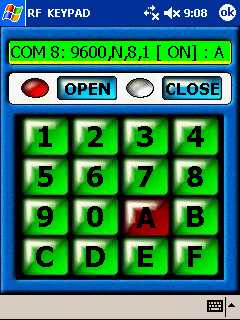
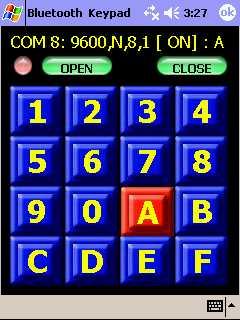
Press key "A"
To transmit the ASCII character that
represents the letter A.
Notice how the "A" key turns from
blue to red to indicate that the "A"
key is being pressed.
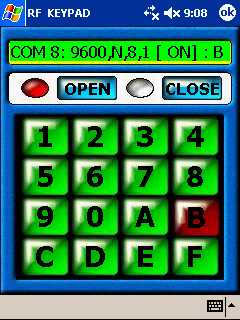
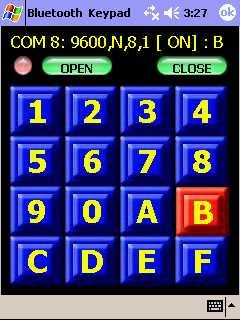
Press key "B"
To transmit the ASCII character that
represents the letter B.
Notice how the "B" key turns from
blue to red to indicate that the "B"
key is being pressed.
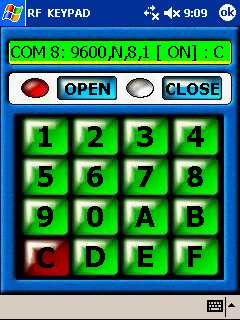
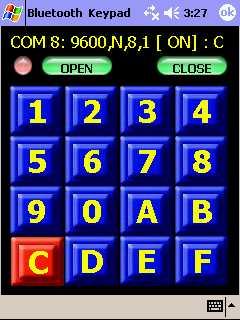
Press key "C"
To transmit the ASCII character that
represents the letter C.
Notice how the "C" key turns from
blue to red to indicate that the "C"
key is being pressed.
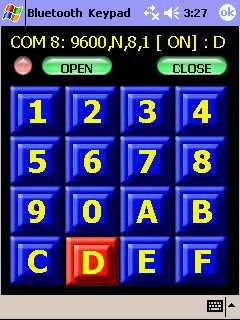
Press key "D"
To transmit the ASCII character that
represents the letter D.
Notice how the "D" key turns from
blue to red to indicate that the "D"
key is being pressed.
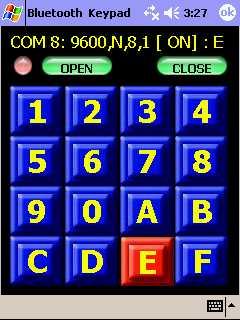
Press key "E"
To transmit the ASCII character that
represents the letter E.
Notice how the "E" key turns from
blue to red to indicate that the "E"
key is being pressed.
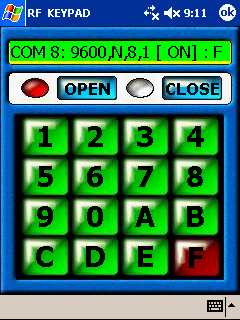
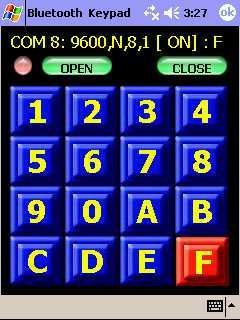
Press key "F"
To transmit the ASCII character that
represents the letter F.
Notice how the "F" key turns from
blue to red to indicate that the "F"
key is being pressed.
Close the Bluetooth Communications Port between the
Pocket PC and the BlueSMiRF Bluetooth Module.
All keys on the keypad are blue.
No key on the keypad is being pressed.
BASIC4PPC PROGRAM CODE LISTING:
Sub Globals
portflag = 0
strlabel0="COM 8: 9600,N,8,1"
strlabel1=" [OFF]"
strlabel2=" [ ON]"
strlabel3=" : "
strlabeltemp=""
End Sub
Sub App_Start
Form1.show
label1.Text = strlabel0 & strlabel1 & strlabel3
strlabeltemp = strlabel0 & strlabel1 & strlabel3
serial.New2 (8,9600,"N",8,1)
Sip=false
image1.Visible=false
image2.Visible=true
image2.Image="r28w35blk.jpg"
End Sub
Sub ImageButton17_Click
image1.Visible=true
image2.Visible=false
image1.Image="r28w35blk.jpg"
If portflag = 0 Then
serial.PortOpen=true
portflag = 1
label1.Text = strlabel0 & strlabel2 & strlabel3
strlabeltemp=label1.Text
serial.enableoncomm=true
serial.Output ("*")
End If
End Sub
Sub ImageButton18_Click
image1.Visible=false
image2.Visible=true
image2.Image="r28w35blk.jpg"
label1.Text = strlabeltemp & ""
If portflag = 1 Then
serial.Output ("^")
serial.enableoncomm=false
serial.PortOpen=false
portflag = 0
label1.Text = strlabel0 & strlabel1 & strlabel3
strlabeltemp=label1.Text
End If
End Sub
Sub ImageButton1_ButtonDown
imagebutton1.Image="redsq.jpg"
serial.Output ("1")
label1.Text = strlabeltemp & "1"
End Sub
Sub ImageButton1_ButtonUp
imagebutton1.Image="bluesq.jpg"
End Sub
Sub ImageButton2_ButtonDown
imagebutton2.Image="redsq.jpg"
serial.Output ("2")
label1.Text = strlabeltemp & "2"
End Sub
Sub ImageButton2_ButtonUp
imagebutton2.Image="bluesq.jpg"
End Sub
Sub ImageButton3_ButtonDown
imagebutton3.Image="redsq.jpg"
serial.Output ("3")
label1.Text = strlabeltemp & "3"
End Sub
Sub ImageButton3_ButtonUp
imagebutton3.Image="bluesq.jpg"
End Sub
Sub ImageButton4_ButtonDown
imagebutton4.Image="redsq.jpg"
serial.Output ("4")
label1.Text = strlabeltemp & "4"
End Sub
Sub ImageButton4_ButtonUp
imagebutton4.Image="bluesq.jpg"
End Sub
Sub ImageButton5_ButtonDown
imagebutton5.Image="redsq.jpg"
serial.Output ("5")
label1.Text = strlabeltemp & "5"
End Sub
Sub ImageButton5_ButtonUp
imagebutton5.Image="bluesq.jpg"
End Sub
Sub ImageButton6_ButtonDown
imagebutton6.Image="redsq.jpg"
serial.Output ("6")
label1.Text = strlabeltemp & "6"
End Sub
Sub ImageButton6_ButtonUp
imagebutton6.Image="bluesq.jpg"
End Sub
Sub ImageButton7_ButtonDown
imagebutton7.Image="redsq.jpg"
serial.Output ("7")
label1.Text = strlabeltemp & "7"
End Sub
Sub ImageButton7_ButtonUp
imagebutton7.Image="bluesq.jpg"
End Sub
Sub ImageButton8_ButtonDown
imagebutton8.Image="redsq.jpg"
serial.Output ("8")
label1.Text = strlabeltemp & "8"
End Sub
Sub ImageButton8_ButtonUp
imagebutton8.Image="bluesq.jpg"
End Sub
Sub ImageButton9_ButtonDown
imagebutton9.Image="redsq.jpg"
serial.Output ("9")
label1.Text = strlabeltemp & "9"
End Sub
Sub ImageButton9_ButtonUp
imagebutton9.Image="bluesq.jpg"
End Sub
Sub ImageButton10_ButtonDown
imagebutton10.Image="redsq.jpg"
serial.Output ("0")
label1.Text = strlabeltemp & "0"
End Sub
Sub ImageButton10_ButtonUp
imagebutton10.Image="bluesq.jpg"
End Sub
Sub ImageButton11_ButtonDown
imagebutton11.Image="redsq.jpg"
serial.Output ("A")
label1.Text = strlabeltemp & "A"
End Sub
Sub ImageButton11_ButtonUp
imagebutton11.Image="bluesq.jpg"
End Sub
Sub ImageButton12_ButtonDown
imagebutton12.Image="redsq.jpg"
serial.Output ("B")
label1.Text = strlabeltemp & "B"
End Sub
Sub ImageButton12_ButtonUp
imagebutton12.Image="bluesq.jpg"
End Sub
Sub ImageButton13_ButtonDown
imagebutton13.Image="redsq.jpg"
serial.Output ("C")
label1.Text = strlabeltemp & "C"
End Sub
Sub ImageButton13_ButtonUp
imagebutton13.Image="bluesq.jpg"
End Sub
Sub ImageButton14_ButtonDown
imagebutton14.Image="redsq.jpg"
serial.Output ("D")
label1.Text = strlabeltemp & "D"
End Sub
Sub ImageButton14_ButtonUp
imagebutton14.Image="bluesq.jpg"
End Sub
Sub ImageButton15_ButtonDown
imagebutton15.Image="redsq.jpg"
serial.Output ("E")
label1.Text = strlabeltemp & "E"
End Sub
Sub ImageButton15_ButtonUp
imagebutton15.Image="bluesq.jpg"
End Sub
Sub ImageButton16_ButtonDown
imagebutton16.Image="redsq.jpg"
serial.Output ("F")
label1.Text = strlabeltemp & "F"
End Sub
Sub ImageButton16_ButtonUp
imagebutton16.Image="bluesq.jpg"
End Sub
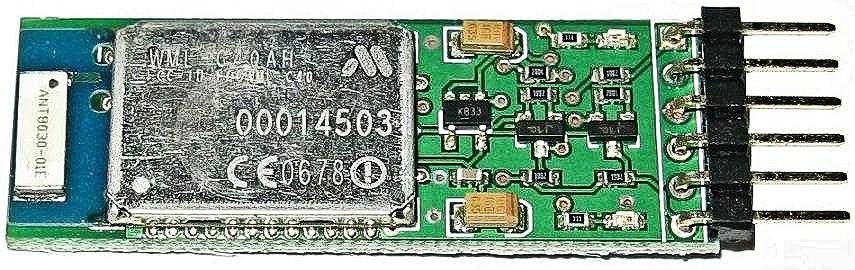
BlueSMiRF Bluetooth Hardware Module with Mitsumi Chip Onboard.
In this example, I am using the version of the BlueSMiRF module that has the
Mitsumi chip onboard the PCB. I am using the factory default settings. I want
to be able to just apply power to the module and use it as is without having to
change any of its internal settings using the AT commands. I want to use the
BlueSMiRF as a wireless serial port connection.
The BlueSMiRF will send out ASCII characters when the Bluetooth serial port
connection is "Opened" and when the connection is "Closed". I used an
Oscilloscope to look at the TX line to determine what the BlueSMiRF module
is doing when the serial port connection is "Opened" and "Closed". I used a
program like "HyperTerminal" on a Personal Computer to find out what the
ASCII character strings actually are by reading the data on the BlueSMiRF TX line.
The following ASCII string information is what the module that I have is sending
out. The string information may vary from one module to another. We do not
really care what the ASCII string information is, since we are not going to use it
anyway, we just need to know that the BlueSMiRF is going to send out a ASCII
character string when the serial port connection is "Opened" and "Closed".
When the Pocket PC "Opens" the Bluetooth serial port connection the BlueSMiRF
module will send out the following string on the TX line:
CONNECT,00043E431B14
When the Pocket PC "Closes" the Bluetooth serial port connection the BlueSMiRF
module will send out the following string on the TX line:
DISCONNECT
By using an Oscilloscope to monitor the BlueSMiRF TX line, you can see the
character strings when they are transmitted when the Bluetooth serial port
connection is "Opened" and "Closed". In between the "Open" and "Close"
events is where we send our ASCII command characters that are specific to
the BASIC4PPC software applications that we have written. So, there are
three basic steps that we need to get the job done.
STEP 1: "Open" the connection and ignore the ASCII character string that
the BlueSMiRF sends out its TX line. We don't want any of the
characters in this string to be processed by the ATHENA
microcontroller as "Commands".
STEP 2: Now that the Bluetooth serial port connection has been "Opened",
we want our BASIC4PPC software application to be able to send
ASCII "Command" characters to the ATHENA microcontroller where
they can be processed.
STEP 3: "Close" the connection and ignore the ASCII character string that
the BlueSMiRF sends out its TX line. We don't want any of the
characters in this string to be processed by the ATHENA
microcontroller as "Commands".
So by using an Oscilloscope to monitor the BlueSMiRF TX line we can see
the ASCII strings when they are transmitted when the Bluetooth serial port
connection is "Opened" and "Closed". We can also see the individual ASCII
"Command" characters that our BASIC4PPC applications are sending to the
microcontroller. Actually, it is all real simple and straight forward.
Program Code Listing for the ATHENA Microcontroller.
'The Bluetooth Keypad program written for the ATHENA
'microcontroller receives ASCII command characters
'that are transmitted by the BASIC4PPC application
'which runs on the Pocket PC.
'The ATHENA will process the ASCII command characters that
'it has received and perform the programmed function.
'The KRONOS ROBOTICS ATHENA EDITOR Version 2.0.9 was
'used to Write the program code, Test, Debug and Program
'the compiled code into the ATHENA microcontroller.
'Dimension the variables used by the program.
dim a,s2cpu
'Initialize the Send to Cpu Flag equal to Zero.
'When this Flag = 0 No data will be processed
'by the ATHENA microcontroller. When this
'Flag = 1 data will be processed by the ATHENA
'microcontroller.
s2cpu=0
'Initialize Port Pin 0 as an Input. Serial data
'received by the BLUESMIRF module from the POCKET
'PC PDA across the Bluetooth connection will be
'received by the ATHENA microcontroller at its
'Port Pin 0. The TX line of the BLUESMIRF module
'is physically wired to Port Pin 0 of the ATHENA.
input 0
'Set the Baud rate on the ATHENA to 9600:N:8:1
setbaud SBAUD9600
'The following line of code will read the serial data
'being sent to Port Pin 0 of the ATHENA. If no data
'is currently being received at Port Pin 0 then program
'control will jump back to the label ( loop1 ). This
'program statement will continually jump back to label
'( loop1 ) until an 8-bit byte is received at Port Pin 0.
'When an 8-bit byte is received at Port Pin 0, the
'received character byte will be stored in the program
'variable ( a ) and program execution will fall through
'to the next line of program code.
loop1: serin loop1,0,a
'If the application running on the POCKET PC PDA sends
'special character ( * ), then set the ( s2cpu ) flag = 1.
'This will tell the ATHENA to go ahead and process the
'8-bit character bytes that it receives. Once the ( s2cpu )
'flag has been set equal to 1, program control will jump
'back to program label ( loop1 ) to receive the next byte.
if a=42 then
s2cpu=1
goto loop1
endif
'If the application running on the POCKET PC PDA sends
'the special character ( ^ ) then set the ( s2cpu ) flag = 0.
'This will tell the ATHENA not to process any of the 8-bit
'character bytes. Once the ( s2cpu ) flag has been set
'equal to 0, program control will jump back to ( loop1 )
'to receive the next byte.
if a=94 then
s2cpu=0
endif
'When the (s2cpu) flag is set equal to 1, then go ahead and process the received
'8-bit chararacter byte.
if s2cpu=1 then
if a=48 then
' Put the software code that you want to run when key 0 is pressed here.
endif
if a=49 then
' Put the software code that you want to run when key 1 is pressed here.
endif
if a=50 then
' Put the software code that you want to run when key 2 is pressed here.
endif
if a=51 then
' Put the software code that you want to run when key 3 is pressed here.
endif
if a=52 then
' Put the software code that you want to run when key 4 is pressed here.
endif
if a=53 then
' Put the software code that you want to run when key 5 is pressed here.
endif
if a=54 then
' Put the software code that you want to run when key 6 is pressed here.
endif
if a=55 then
' Put the software code that you want to run when key 7 is pressed here.
endif
if a=56 then
' Put the software code that you want to run when key 8 is pressed here.
endif
if a=57 then
' Put the software code that you want to run when key 9 is pressed here.
endif
if a=65 then
' Put the software code that you want to run when key A is pressed here.
endif
if a=66 then
' Put the software code that you want to run when key B is pressed here.
endif
if a=67 then
' Put the software code that you want to run when key C is pressed here.
endif
if a=68 then
' Put the software code that you want to run when key D is pressed here.
endif
if a=69 then
' Put the software code that you want to run when key E is pressed here.
endif
if a=70 then
' Put the software code that you want to run when key F is pressed here.
endif
endif
goto loop1
Improving the Graphic User Interface (GUI).
We can improve the look of the graphics used in the program by using a skinning tool to create the button images and the background image for the Form.